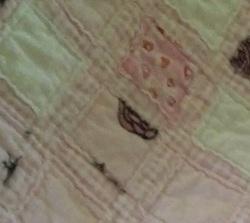
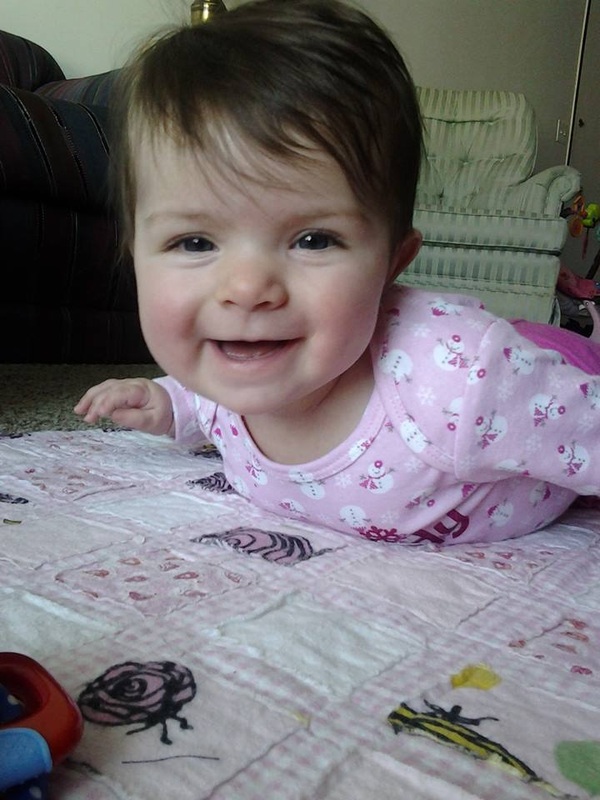
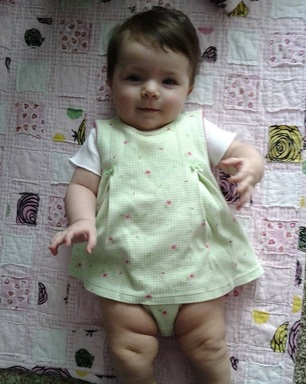
I was invited to a baby shower for a friend at church, so I thought I would make a quick rag quilt from the flannel I have left over from the QD vintage baby quilt I made last year.
Since I had never made a rag quilt before, I went searching and found this excellent tutorial for making rag quilts: tutorial.
The process was very simple, and really quick, which made this quick-and-dirty diva very happy! I think it took just under 8 hours to complete, including the time to clip all the seams, which I did while catching up on Downton Abbey :)
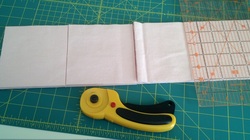
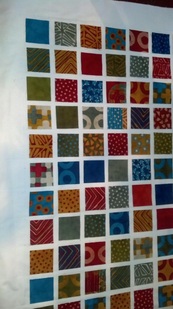
I started by deciding how big to make the quilt, which was primarily determined by how much fabric I had available. Thankfully, I had just enough to follow the tutorial directions. So, I cut 64 five-inch squares for the front and 64 five-inch squares for the back. I also cut 64 four-inch squares from batting scraps I had left over from other quilts. You cut these one inch smaller because you don't want the batting extending into the 1/2-inch seam allowances on the squares.
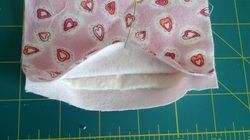
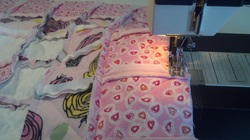
Once I had all the squares cut, I sandwiched together a backing square, batting square, and top square, with right sides facing out, and sewed an "X" across the square, stopping about a half-inch from the corners. Even though you might be able to complete this step without a walking foot, you will definitely need one when you join the rows. So, this might not be the quilt for you, if you don't own a walking foot.
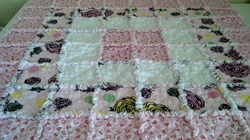
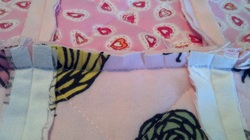
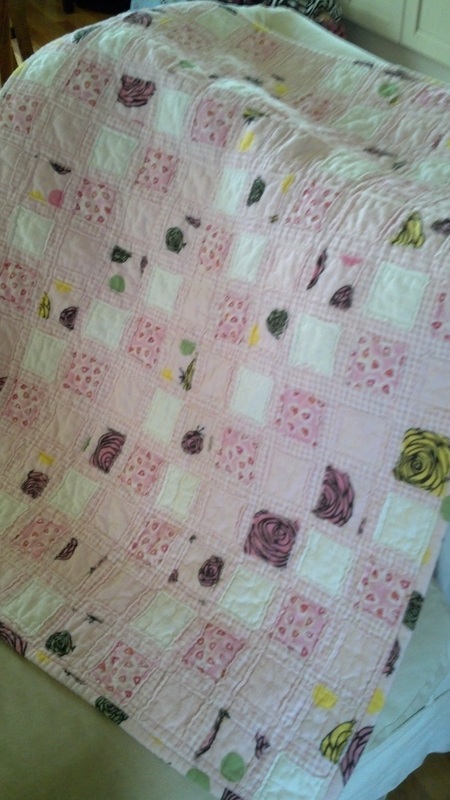
Once I had sewn X's in all the square sandwiches, I started joining the squares into rows, using a half-inch seam allowance and sewing edge-to-edge. If you don't have a particular pattern in mind for this finished quilt, you can just join them randomly. I wanted to do concentric squares, like in the tutorial, so I had the sketch I had done of my plan handy as I was joining squares.
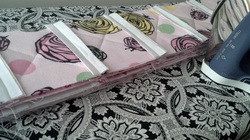
I'm not sure I HAD to do this next step. And, but I'm in love with the iron my mom and dad got me for Christmas, so I pressed all the seams open before I joined the rows. You purist quick-and-dirty divas could probably have just finger-pressed them open as you sewed and done just fine. Here's my stack of rows, pressed and stacked in the order I need to sew them together.


Once I had all the rows sewn together, I was ready to finish the edges. I could have done a traditional binding, but decided to just sew a half-inch seam around the entire outside edge, so I could clip it and let it get fuzzy like the rest of the quilt. Of course, this quick edge also fed my inner QD diva, which made me very happy :) I am a fickle person, and my love affair with my new iron had waned by then, so I just finger-pressed the seams open as I made my way around the quilt.
Next, I joined the rows together, using a half-inch seam allowance, sewing from edge to edge, keeping all seam allowances open, and matching the seams. You definitely need a walking foot for this step, since you are sewing through a bazillion layers of fabric at the seams.
After I had sewn a couple rows, I noticed that the seam allowances on some of the bottom squares were not laying flat as I sewed over them, so I started to pay closer attention to that, often lifting my presser foot as I approached a seam to smooth out the allowances. I didn't bother to go back and fix any of them, though, since I was just going to be clipping the seam allowances and the cute fuzziness would likely hide those.
After I had sewn a couple rows, I noticed that the seam allowances on some of the bottom squares were not laying flat as I sewed over them, so I started to pay closer attention to that, often lifting my presser foot as I approached a seam to smooth out the allowances. I didn't bother to go back and fix any of them, though, since I was just going to be clipping the seam allowances and the cute fuzziness would likely hide those.
Next, I had to clip all the seam allowances, including the outside edges. I quickly realized that this would take a while, so I decided to save this last step for later that evening, when my hubby and I were catching up on Downton Abbey. When you do this step, be sure that you don't clip through any of the seams. I did that in one spot and had to go back to the machine to reinforce the seam in that area. I generally clipped about every half inch. But being the QD diva that I am, you know I didn't measure or mark any of that!
The last step was to wash the quilt to make those beautiful ruffly edges. I washed this quilt on a what my machine calls a normal cycle (warm wash and rinse) and dried it on high heat.
I love the way the quilt turned out! It is a quick way to use fabric and batting scraps. Who wouldn't love that?!
The last step was to wash the quilt to make those beautiful ruffly edges. I washed this quilt on a what my machine calls a normal cycle (warm wash and rinse) and dried it on high heat.
I love the way the quilt turned out! It is a quick way to use fabric and batting scraps. Who wouldn't love that?!


 RSS Feed
